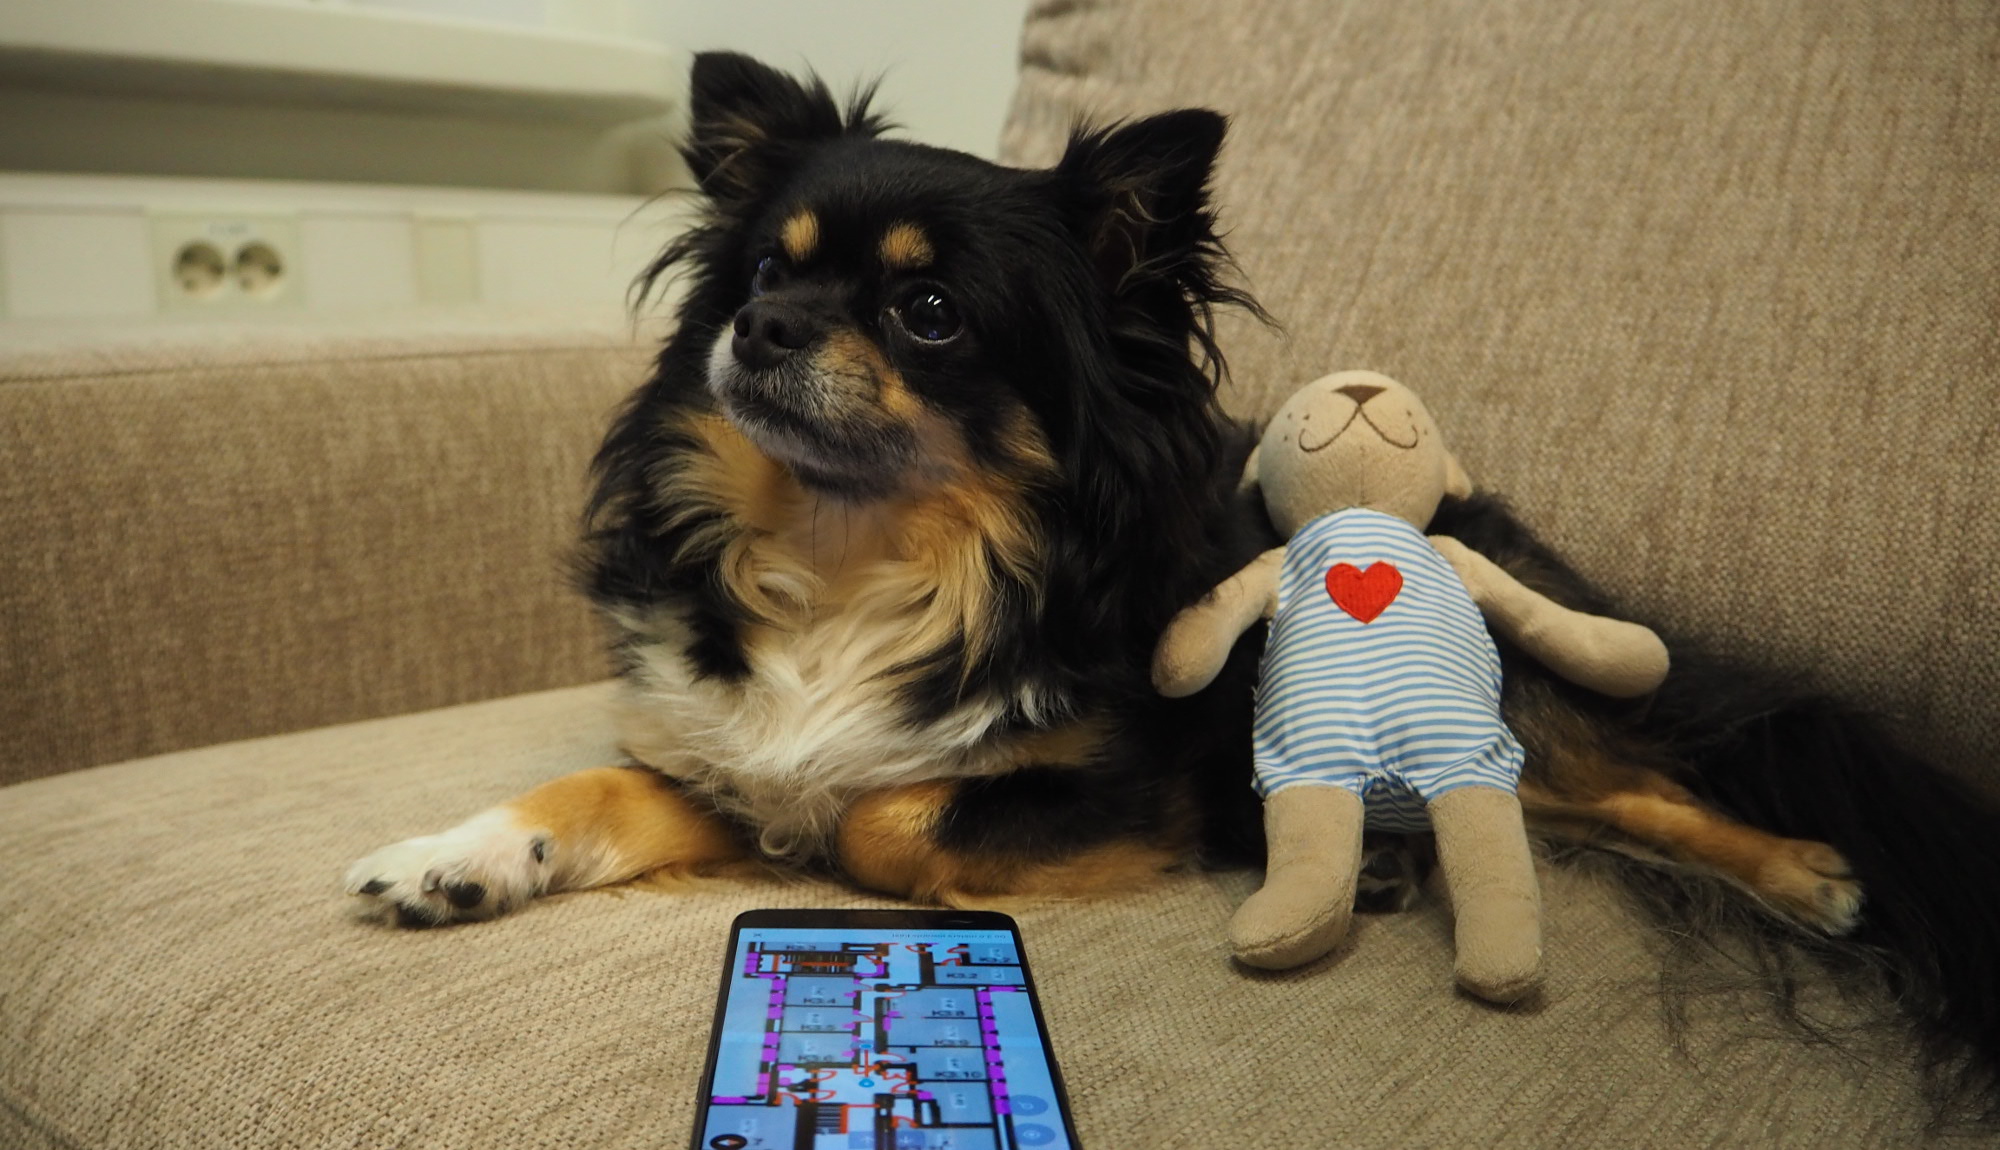
As you might have already heard, we have recently released a new feature to our platform -wayfinding. Our dedicated team has worked very hard to make this tool as user-friendly, easy and fast as possible for our customers and we wanted to show off this tool by creating a dogtastic video of it 🐶. Scroll down to the end of the post to see the film. Today we provide you behind-the-scenes-tour which will show you the setup that we made for the video, how much it took time and how this feature helped our Dedicated Office Guard Minkki to find his Teddy 🐻.
This post will provide you an overview of the setup of this video and what it takes to provide indoor wayfinding with our platform. Before we started shooting, we had…
- The venue. Our office is in a hospital-turned-startup-hub, consisting of total 5000 square meters (about 54 000 square feet), spread across multiple interconnected buildings in three floors. We used all corridor spaces and common areas for the setup (around 750 square meters).
- Beacons in place and added as inputs in Proximi.io account. Altogether we used 21 beacons. This task took us about 1,5 hours. If you want to know more about how to set up your beacons correctly, please visit our previous blog post about “How to do accurate indoor positioning with Bluetooth beacons?”.
- Mapping with IndoorAtlas positioning technology. This was done throughout the building and took approximately 3,5 hours to complete. This step is not necessary, but you might need some more beacons in your setup.
- Floor plan of the building added under the Proximi.io account.
- Demo application with our SDK and wayfinding implemented.
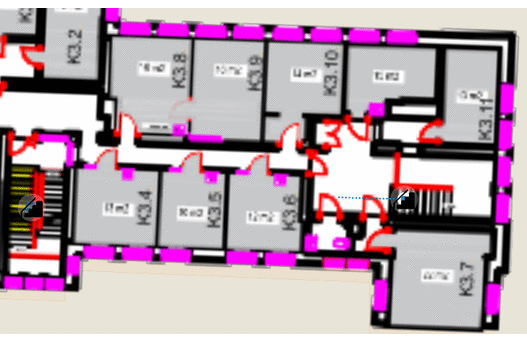
After this setup we were good to go and draw the routes on the floor plans. This was done in the Mapping tool in Proximi.io portal. To obtain access to this tool, please contact us.
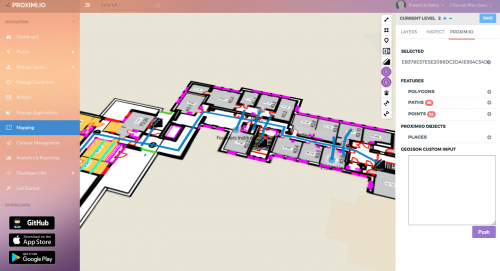 Picture 1. Overview of Mapping tool.
After opening the mapping tool, we were able to see the floor plans as expected. We started the mapping by adding Point of Interests (POI). If you have something interesting in your environment and you want your users to be able to navigate there, please mark it with with a Point of Interest. In our video we marked Teddy on the map as it was important for Minkki to find his friend. Please see the picture below where the marker tool has been marked with a green circle and Teddy has been added as POI.
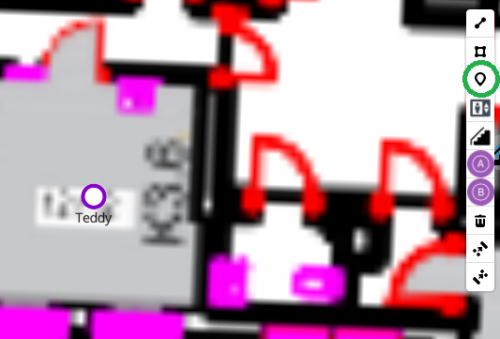 Picture 2. Teddy marked as POI.
After marking Teddy and other important places such as Minkki’s favourite dog park, we continued and marked staircases. The wayfinding functions across floors, and staircase and elevator symbols are used to mark the connections between floors. In order to add a staircase, please choose the picture of stairs from the toolbox and add it on the floor map. It’s important to remember to adjust the stairs to right floors (level_min and level_max). This can be done in the right sidebar, please see the picture below where we adjusted the stairs from the first floor to the third.
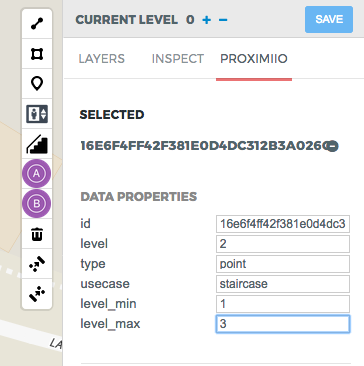 Picture 3. Adjusting level_min and level_max.
Once we were ready with our stairs and POIs, we continued by drawing the routes on the map with LineString tool (first one in the list). This task took us about 2 hours. Please see the demonstrative gif below.
Gif 1. Demonstrating gif about drawing routes.
When you are drawing the routes, it’s important to make sure that you don’t leave small gaps between them. For routes that cross it is recommended to exaggerate the crossing. When we were in the middle of the routing, we used the Route Start Point and Route End Point to test them. You can use those to test the routes is real time. If the green line appears correctly between the A and B points, the route is connected correctly.
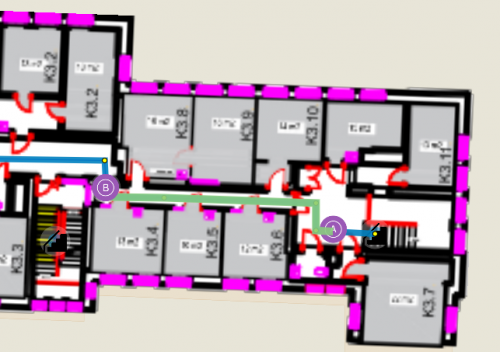 Picture 4. Testing the routes with A and B points.
Once we had our routes in place, Minkki was ready to go and navigate himself to Teddy. All in all this project took us about 8 hours to complete (excluding filming and the Demo application development). The best part about the wayfinding is that the routes can be edited online on-the-fly, is need arises.
Minkki’s way to Teddy was full of dangerous stairs and scary corners, go ahead and check the video below to see the rest of his adventure 🌍!